If you have recently moved into a pre-war building in the Upper West Side, a brownstone in Brooklyn, or a historic row house in Boston, you have likely encountered the “Pre-War Pop.” It’s that sinking feeling when you try to nail a hook into the wall, and instead of a solid grip, you hear a crunch, feel the nail slide into a void, and watch a spiderweb crack spread across your paint.
This is not drywall. And treating it like drywall is the fastest way to lose your security deposit.
At ArtInstallPros, we estimate that 40% of our repair calls in the Tri-State area come from homeowners who tried to use standard hardware on lath and plaster walls. Here is the technical reality of why your walls are fighting you, and the specific “surgical” protocols we use to win.
The Physics of Failure: The “Crumble Cone”
Most generic advice tells you plaster is “brittle.” That is an understatement. To understand the risk, you have to visualize the physics.
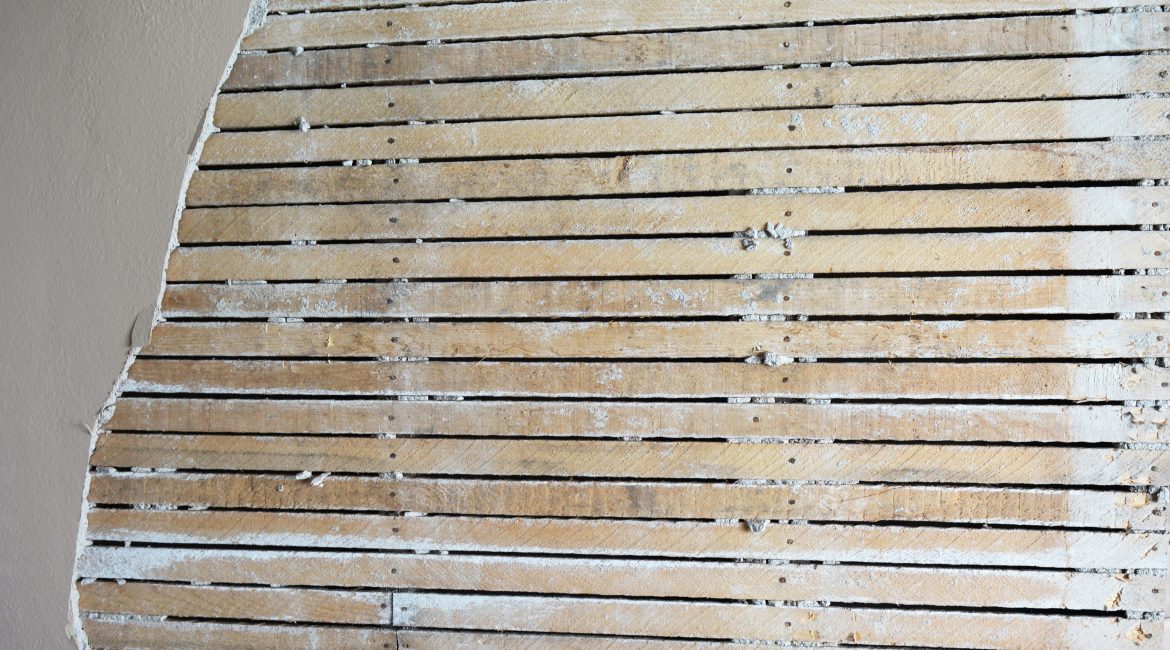
Plaster walls are held together by “keys”—globs of plaster that were pushed through wooden slats (lath) in the 1920s and 30s. When you hammer a nail, you aren’t just piercing the surface; you are sending a shockwave through the wall.
This shockwave snaps the keys off the back of the lath. From the front, it looks like a small hole. But inside the wall, you have created a “Crumble Cone”—a blowout where the plaster has detached from the wood structure. Over time, gravity pulls this loose section down, causing the paint to bubble and the art to pull the wall surface onto the floor.
Why Your Stud Finder is Lying to You
If you bought a $30 stud finder at a hardware store, it is likely useless in a pre-war apartment. Here is why:Standard stud finders work by detecting density changes. But a plaster wall has inconsistent density everywhere due to the uneven hand-troweled application and the wooden lath strips. Your device will beep randomly, leading you to drill into empty voids.The Pro Solution: We ignore density scanners. Instead, we use industrial Rare Earth Magnets. We hunt for the tiny, iron nails that the original builders used to attach the wood lath to the vertical studs. Finding a vertical line of these tiny nails is the only 100% accurate way to map the skeleton of a pre-war room.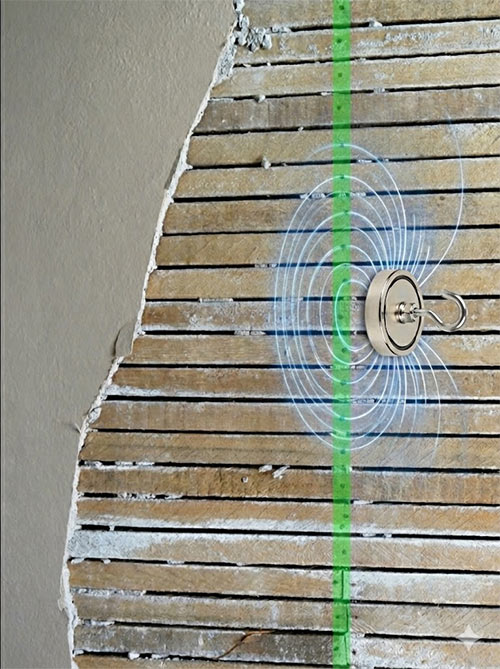
The green line indicates the stud behind the lathes.
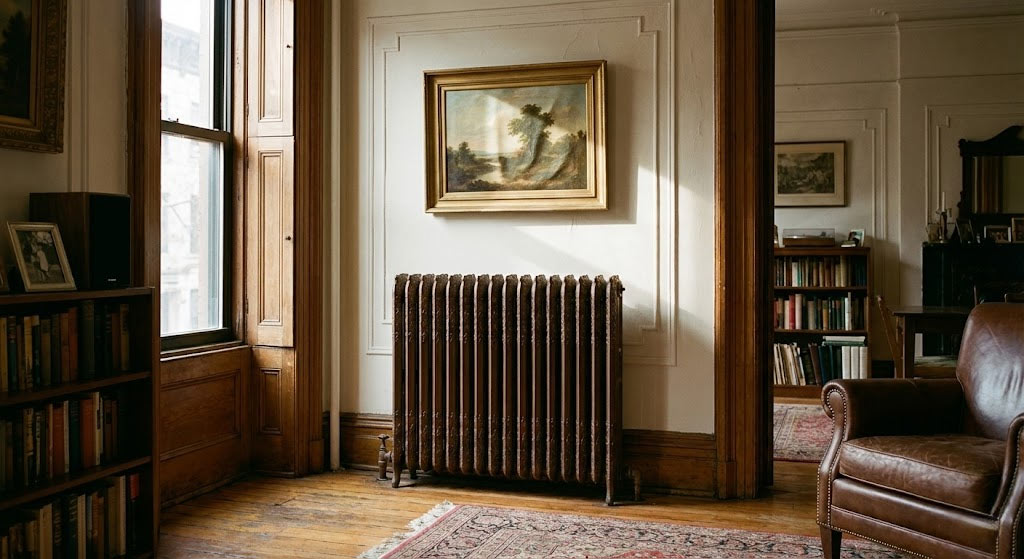
The heat and humidity from an old steam radiator warped the painting’s canvas over time.
The “Radiator Factor” (Crucial for NYC/Boston)
This is a specific danger in pre-war apartments that is easy to overlook. While steam radiators are obvious visual features, many homeowners underestimate the invisible column of heat—and moisture—rising from them.
Old radiators are equipped with air valves that frequently “bleed” or release small puffs of steam to regulate pressure. This means hanging art above a radiator exposes it to a double threat: temperatures approaching 100°C (212°F) and direct moisture.
This combination is devastating for fine art. The moisture causes canvas to slacken and paper to ripple, while the heat dries it out rapidly, causing cracking.
Our Protocol: Drill, Don’t Hammer
When ArtInstallPros operates in a historic home, we leave the hammers in the truck. Our process is closer to dentistry than construction:
- The Tape Trap: We apply blue painter’s tape over the drill site. This isn’t just for marking; the adhesive binds the top layer of paint to the plaster, preventing the surface from chipping when the drill bit makes contact.
- The Catch (Zero-Mess Guarantee): Plaster dust is heavy, gritty, and abrasive. We refuse to let it land on your floors or furniture. Depending on the job, we utilize a HEPA vacuum “shadowing” technique that sucks up debris the moment it leaves the wall, or specialized adhesive dust collector pockets attached directly below the drill site. We catch the dust at the source, before it ever becomes airborne.
- The Anchor: We try to avoid conical plastic anchors. In plaster, we use Toggle Bolts for items over 40 lbs (which clamp the wall from behind) or Deep-Threaded Masonry Screws for lighter items. Note: If we drill and hit solid brick (common on “party walls” shared between brownstones), we switch to masonry anchors specifically designed for historic brick.
The “Wavy Wall” Challenge
Pre-war walls are hand-troweled, which means they are rarely perfectly flat. If you hang a large mirror or triptych on a wavy wall, one corner will likely jut out, ruining the look.
We solve this with variable-depth standoffs. By adjusting the padding behind the frame, we can “float” the artwork so it sits perfectly plumb and level, essentially correcting the visual imperfections of the wall itself.
The Zero-Drill Solution: Picture Rails
Many pre-war apartments still possess their original architectural picture molding—a strip of wood located 12–18 inches below the ceiling. Many homeowners mistake this for decorative trim, but it is actually a functional hanging system.If you have this molding, we can utilize gallery-grade cables and rail hooks. This allows us to suspend art without drilling a single hole in your historic walls. It preserves the plaster entirely and allows you to adjust the height of your art instantly—a favorite technique for collectors who rotate their pieces frequently.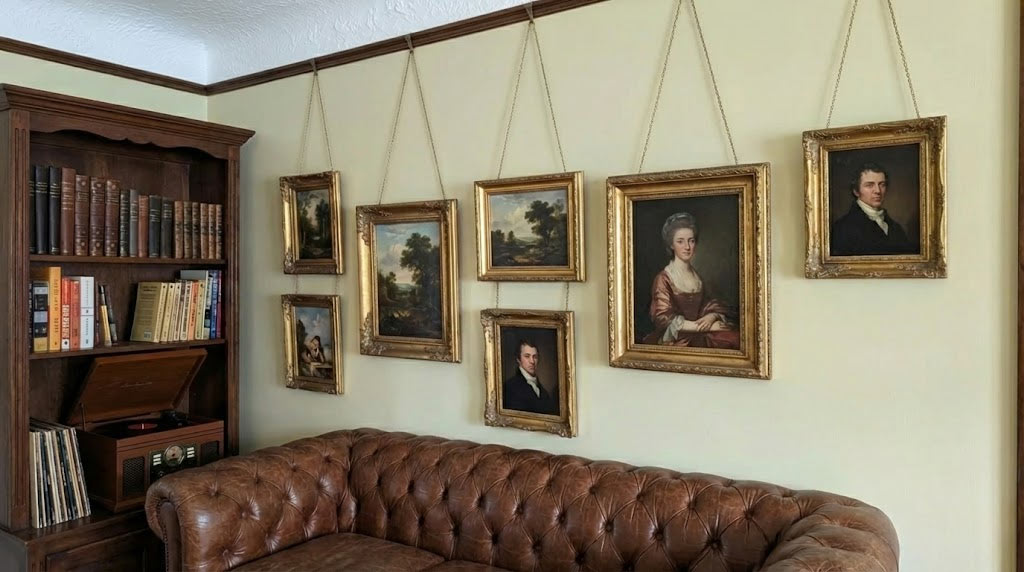
Picture rails are one of the favorite old house features